
252 lines
10 KiB
Markdown
252 lines
10 KiB
Markdown
---
|
||
title: egret 练手 《围住神经猫》
|
||
tags: []
|
||
id: '115'
|
||
categories:
|
||
- - 分享
|
||
date: 2017-09-04 11:42:10
|
||
---
|
||
|
||
Egret引擎是一个开源免费的游戏框架,用于构建二维游戏、演示程序和其他图形界面交互应用等。Egret使用TypeScript脚本语言开发。当游戏完成最终的打包后,可以将程序转换为HTML5游戏。实现跨平台特性。 Egret不仅仅是一个基于HTML5技术的游戏引擎,我们的产品线中除了Egret引擎还提供了很多辅助游戏开发的工具。准确的来说,Egret是一套游戏开发的解决方案。你可以使用Egret引擎来帮助你开发HTML5游戏,并运行在手机和PC端的浏览器中,同时也你可以使用Egret提供的相关工具搭建你自己的游戏开发工作流。 Egret的语法与ActionScript 3.0 一致,如果对as3.0熟悉的童鞋能很快上手。 果然有兴趣的童鞋可以直接去Egret的官网,有详细的文档资料 [白鹭引擎官网](https://www.egret.com/) 最近学习Egret,看了一些文档后,决定找个简单的项目自己练一下手,《围住神经猫》应该是个很好的选择。 先贴上完成的作品 [Demo](https://demo.dengtongyu.com/pages/nervcat/) **1.新建项目** 打开EgretWing --> 文件 --> 新建项目 --> Egret游戏项目 完成后打开 src 下的 Main.ts,改文件就是整个项目的入口文件,里面还有一些已经写好的方法,方便你后面调用。 具体请参考 [传送门](http://edn.egret.com/cn/article/index/id/579) 里面介绍得很详细 **2.加载进度条** 新建游戏项目后,默认的加载进度比较简陋,我们需要美化一下。 打开 src\\LoadingUI.ts 文件,这个就是加载进度条的类。
|
||
|
||
```
|
||
|
||
class LoadingUI extends egret.Sprite {
|
||
|
||
public constructor() {
|
||
super();
|
||
this.createView();
|
||
}
|
||
|
||
private textField:egret.TextField;
|
||
|
||
private createView():void {
|
||
this.textField = new egret.TextField();
|
||
this.addChild(this.textField);
|
||
this.textField.y = 300;
|
||
this.textField.width = 480;
|
||
this.textField.height = 100;
|
||
this.textField.textAlign = "center";
|
||
}
|
||
|
||
public setProgress(current:number, total:number):void {
|
||
this.textField.text = `Loading...${current}/${total}`;
|
||
}
|
||
}
|
||
```
|
||
|
||
从代码可以看出,进度条仅仅是用文字展示了加载进度,我们来加个进度条UI美化一下。
|
||
|
||
```
|
||
|
||
class LoadingUI extends egret.Sprite {
|
||
|
||
public constructor() {
|
||
super();
|
||
this.createView();
|
||
}
|
||
|
||
private textField:egret.TextField;
|
||
private pBarBg:egret.Shape;
|
||
private pBarMove:egret.Shape;
|
||
|
||
private createView():void {
|
||
this.pBarBg = new egret.Shape();
|
||
this.pBarBg.graphics.beginFill( 0x989898, 1);
|
||
this.pBarBg.graphics.drawRect( 0, 0, this.width, this.height );
|
||
this.pBarBg.graphics.endFill();
|
||
this.addChild(this.pBarBg);
|
||
|
||
this.pBarMove = new egret.Shape();
|
||
this.addChild(this.pBarMove);
|
||
|
||
this.textField = new egret.TextField();
|
||
this.textField.width = this.width;
|
||
this.textField.textAlign = "center";
|
||
this.textField.y = 15;
|
||
this.addChild(this.textField);
|
||
}
|
||
|
||
private moveProgressBar(percent:number):void{
|
||
this.pBarMove.graphics.beginFill( 0x518cdd, 1);
|
||
this.pBarMove.graphics.drawRect( 0, 0, this.width*percent, this.height);
|
||
this.pBarMove.graphics.endFill();
|
||
}
|
||
|
||
public setProgress(current:number, total:number):void {
|
||
var num = Math.floor(current / total * 100);
|
||
this.textField.text = 'Loading... ' + num.toString() + " %";
|
||
this.moveProgressBar(current/total);
|
||
}
|
||
}
|
||
```
|
||
|
||
效果如图: 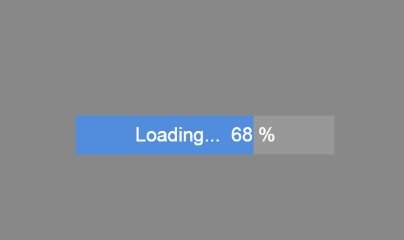 **3.开始画面** 进度条弄好之后,我们开始做游戏开始的画面。如图: 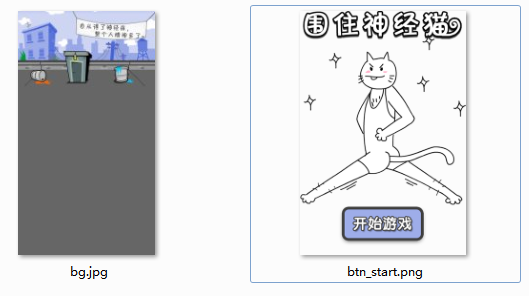 可以看出,开始画面由背景、网格地图和开始按钮的图片组成,这个实现起来很简单。
|
||
|
||
```
|
||
|
||
private mapGroup:eui.Group;//地图容器
|
||
private circleArray:Array<object>;//圆圈网格的数组
|
||
|
||
private bg:egret.Bitmap;//开始Bitmap
|
||
private popGroup:eui.Group;//开始画面容器
|
||
private btnStart:eui.Button;//开始按钮
|
||
private btnStartPng:egret.Bitmap;//开始Bitmap
|
||
|
||
private init():void{
|
||
//利用白鹭预设的创建bitmap方法创建背景图片
|
||
this.bg = this.createBitmapByName("bg_jpg");
|
||
this.stage.addChild(this.bg);
|
||
|
||
//地图容器
|
||
this.mapGroup = new eui.Group();
|
||
this.mapGroup.width = 560;
|
||
this.mapGroup.height = 560;
|
||
this.mapGroup.x = 40;
|
||
this.mapGroup.y = 400;
|
||
this.stage.addChild(this.mapGroup);
|
||
|
||
//开始画面容器
|
||
this.popGroup = new eui.Group();
|
||
this.popGroup.width = this.SW;
|
||
this.popGroup.height = this.SH;
|
||
this.popGroup.layout = new eui.BasicLayout();
|
||
this.stage.addChild(this.popGroup);
|
||
|
||
//开始Bitmap
|
||
this.btnStartPng = this.createBitmapByName("btn_start_png");
|
||
this.btnStartPng.scaleX = this.btnStartPng.scaleY = 1.2;
|
||
|
||
//开始按钮
|
||
this.btnStart = new eui.Button();
|
||
this.btnStart.width = this.btnStartPng.width;
|
||
this.btnStart.height = this.btnStartPng.height;
|
||
this.btnStart.horizontalCenter = 0;
|
||
this.btnStart.verticalCenter = 0;
|
||
this.popGroup.addChild(this.btnStart);
|
||
this.btnStart.addChild(this.btnStartPng);
|
||
this.btnStart.addEventListener(egret.TouchEvent.TOUCH_TAP,this.touchHandler,this);
|
||
|
||
}
|
||
|
||
private touchHandler(event:TouchEvent) {
|
||
this.popGroup.visible = this.btnStartPng.visible = false;
|
||
this.btnStart.removeEventListener(egret.TouchEvent.TOUCH_TAP,this.touchHandler,this);
|
||
}
|
||
|
||
|
||
|
||
然后在createGameScene方法里面执行this.init()就可以了。
|
||
|
||
但是我们还要绘制围住神经猫的9X9的网格地图。
|
||
我们在 src 下面创建一个自定义布局类,命名为 Map.ts
|
||
```
|
||
|
||
```
|
||
|
||
module uilayout {
|
||
|
||
var UIComponentClass = "eui.UIComponent";
|
||
|
||
/**自定义的布局类*/
|
||
export class CatMap extends eui.LayoutBase{
|
||
public constructor(){
|
||
super();
|
||
}
|
||
/**
|
||
* 计算target的尺寸
|
||
* 如果您的自定义布局需要根据内部子项计算尺寸,请重写这个方法
|
||
**/
|
||
public measure():void{
|
||
super.measure();
|
||
}
|
||
/**
|
||
* 重写显示列表更新
|
||
*/
|
||
public updateDisplayList(unscaledWidth:number, unscaledHeight:number):void{
|
||
super.updateDisplayList(unscaledWidth, unscaledHeight);
|
||
if (this.target==null)
|
||
return;
|
||
let sunElement:eui.UIComponent;
|
||
//子元素个数
|
||
let count:number = this.target.numElements;
|
||
//元素x轴方向间隔
|
||
let gapX:number = 0;
|
||
//元素y轴方向间隔
|
||
let gapY:number = 0;
|
||
//元素所在列数
|
||
let column:number = 0;
|
||
//元素所在行数
|
||
let row:number = 0;
|
||
//奇偶行数错位距离
|
||
let parityWidth:number = 0;
|
||
if(count > 0) {
|
||
sunElement = <eui.uicomponent> this.target.getElementAt(0);
|
||
gapX = (unscaledWidth - sunElement.width * 9 - sunElement.width / 2)/8;
|
||
gapY = (unscaledHeight - sunElement.height * 9 - sunElement.height / 2)/8;
|
||
//console.log(unscaledWidth,unscaledHeight,sunElement.width,sunElement.height);
|
||
}
|
||
for (let i:number = 0; i < count; i++){
|
||
|
||
let layoutElement:eui.UIComponent = <eui.uicomponent> ( this.target.getElementAt(i) );
|
||
if ( !egret.is(layoutElement,UIComponentClass) !layoutElement.includeInLayout ) {
|
||
continue;
|
||
}
|
||
row = Math.floor(i / 9);
|
||
column = i % 9;
|
||
if(row % 2 == 0) {
|
||
parityWidth = 0;
|
||
}else{
|
||
parityWidth = layoutElement.width / 2;
|
||
}
|
||
let childX:number = column * (layoutElement.width + gapX) + parityWidth;
|
||
let childY:number = row * (layoutElement.height + gapY);
|
||
layoutElement.setLayoutBoundsPosition(childX, childY);
|
||
}
|
||
}
|
||
}
|
||
}
|
||
```
|
||
|
||
这样一个自定义布局类就写好了,如果对自定义布局不太了解的,可以去Egret的官网查看文档 [传送门](http://edn.egret.com/cn/article/index/id/525) 然后,我们在Main.ts入口文件里绘制9X9的圆圈网格。
|
||
|
||
```
|
||
|
||
/**创建网格**/
|
||
private creatMap() {
|
||
this.circleArray = new Array();
|
||
for(let i = 0;i<81;i++){ let circleData = new Object(); circleData['ui'] = new eui.Group(); circleData['ui'].name = i; circleData['img1'] = this.createBitmapByName('pot1_png'); circleData['img2'] = this.createBitmapByName('pot2_png'); if(i == 40) { circleData['img1'].visible = true; circleData['img2'].visible = false; circleData['val'] = 0; }else{ if(Math.random()*10 > 8) {
|
||
circleData['img1'].visible = false;
|
||
circleData['img2'].visible = true;
|
||
circleData['val'] = 1;
|
||
}else{
|
||
circleData['img1'].visible = true;
|
||
circleData['img2'].visible = false;
|
||
circleData['val'] = 0;
|
||
}
|
||
}
|
||
this.circleArray.push(circleData);
|
||
circleData['img1'].scaleX = circleData['img1'].scaleY = 1.2;
|
||
circleData['img2'].scaleX = circleData['img2'].scaleY = 1.2;
|
||
circleData['ui'].width = circleData['img1'].width;
|
||
circleData['ui'].height = circleData['img1'].height;
|
||
//circleData['ui'].layout = new eui.BasicLayout();
|
||
circleData['ui'].addChild(circleData['img1']);
|
||
circleData['ui'].addChild(circleData['img2']);
|
||
if(i == 40) {//中间神经猫的位置
|
||
this.insertRunCat(circleData['ui']);
|
||
this.cat.visible = false;
|
||
this.catPos = 40;
|
||
}
|
||
if(circleData['val'] == 0) {
|
||
circleData['img1'].touchEnabled = true;
|
||
circleData['img1'].addEventListener(egret.TouchEvent.TOUCH_TAP,this.touchCircle,this);
|
||
}
|
||
this.mapGroup.addChild(circleData['ui']);
|
||
}
|
||
//引用自定义布局
|
||
this.mapGroup.layout = new uilayout.CatMap();
|
||
}
|
||
```
|
||
|
||
然后在init方法里面执行this.creatMap()就可以完成绘制了 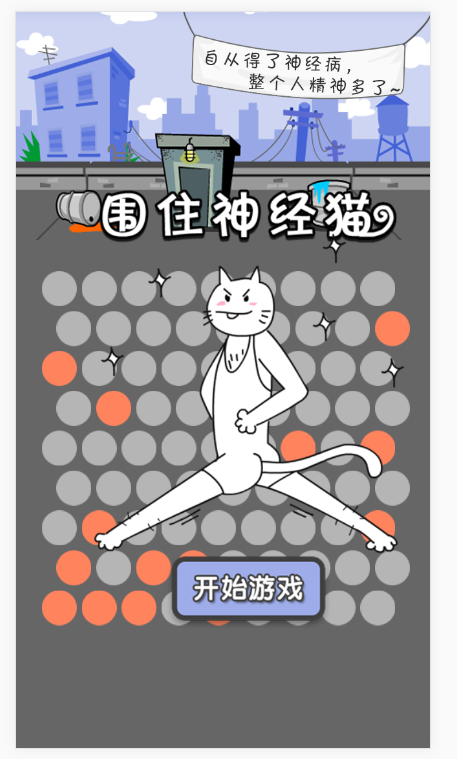 后面的操作逻辑就不赘述了,有机会再跟大家分享。 |